In the previous posting you learned how to set up your iPython notebook environment based on Anaconda. Now we want to import data from AdWords into the tool.
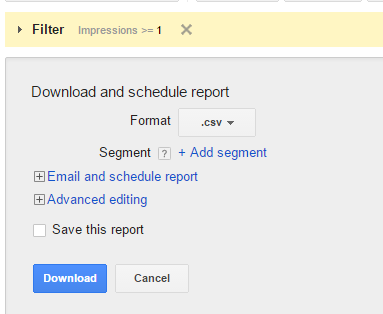
First, download a keyword report from AdWords. For this tutorial I use a report directly from the interface. Of course you can import reports from the MCC level as well. Make sure to set the format to “.csv” instead of the default “Excel .csv”:

Now add this code into your iPython Notebook:
Cell 1:
|
1 2 3 4 5 |
# This loads the necessary libraries: import pandas as pd import numpy as np import os import glob |
Cell 2:
|
1 2 3 4 5 6 7 8 9 |
def fimport(path, filename, sep=',', encoding='utf-8', skiprows=1, header=0): allFiles = glob.glob(path + filename) frame = pd.DataFrame() df_list = [] for file in allFiles: frame = pd.read_csv(os.path.join(path,file), sep=sep, skiprows=skiprows, header=header, encoding=encoding) df_list.append(frame) df = pd.concat(df_list, ignore_index=True) return df |
This block of code is a “function”. Functions are a way of structuring your program. It is a good programming practice to use functions whenever you plan to use a block of code more than once in your program. A function takes some input as arguments and it returns some output. Our function “fimport” takes these arguments:
- path: The path to your .csv file.
- filename: The name of the .csv file.
- sep: CSV separator. AdWords files are delimited by comma.
- encoding: The file’s encoding. AdWords files are encoded in “utf-8”.
- skiprows: How many rows should be skipped from the top of the file? If you downloaded directly from the interface there will be one row that contains the timeframe.
- header: The row that contains the column headers.
fimport in this version can not just load one file. It is able to even import several similarly structured .csv files alltogether. Then it concatenates these files into one big table. That’s why you can see a for … in loop in the script.
Running just the cell which contains the function just loads the function definition into Python. But it did not do more. To achieve anything with it, we need to call the function:
Cell 3:
|
1 2 3 4 5 |
path = r'C:\Users\smiss\Downloads/' path = path.replace("\\", "/") filename = 'Keyword report.csv' df = fimport(path, filename, encoding='utf-8', skiprows=1) |
The first three lines set the path and filename. The replace method I used here replaces Backslashes with Slashes. This is only needed if you use iPython in a Windows environment. Otherwise you can remove that line. In line 5 we finally call the import function fimport with just the two arguments for encoding and for skiprows. If you do not set the other arguments then the default is taken from the function definition. “df” is our “DataFrame” (that is basically Pandas name for a table). You could have named that differently (e.g. “keywords” or “kw”) but I stick to the common “df”.
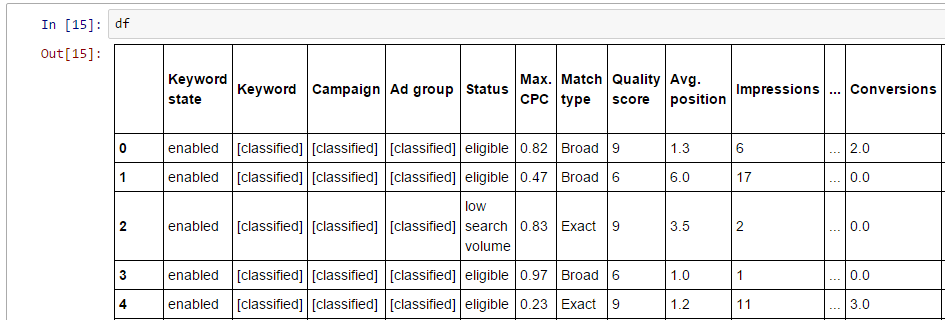
Now we can have a look how our imported table looks like. Just enter “df” into a new cell an run it with Ctrl+Enter:

Pandas shows the table. You can see all your keywords and their performance data.
In the next posting I will show you how to work with that table. How to slice and modify the data and re-export it later in a new .csv.
(Title Image: Creative Commons 3.0)
Leave a Reply
You must be logged in to post a comment.